Cave: Game User Interface (Game UI) System
UI Toolkit and Entity Hierarchy
Lesson 2 of 6 • 10 XP
Keep your place in this quest
Log in or sign up for free to subscribe, follow lesson progress, and access more learning content.
In this lesson, we will learn how Cave Engine’s entity parent-child system works.
This feature can be used with any type of Entity in the scene, allowing you to create organized hierarchies between objects.
When creating user interfaces, this becomes especially useful. By defining one UI Element as the parent of other UI Elements, transformations such as position, scale, and visibility are automatically propagated to the child elements.
This makes interface organization much easier, simplifies the editing of menus and panels, and makes managing more complex UI structures much more efficient.
1. Creating UI Toolkit Elements
In addition to the UI Element Default created previously, add three more interface elements using the UI Toolkit:
- Input Slider
- Input Number
- Input Text
We will test in practice how each of these elements behaves during gameplay.
Then, we will use these components to create an entity hierarchy by making them children of the UI Element Default, demonstrating how the parent-child system helps organize the interface.
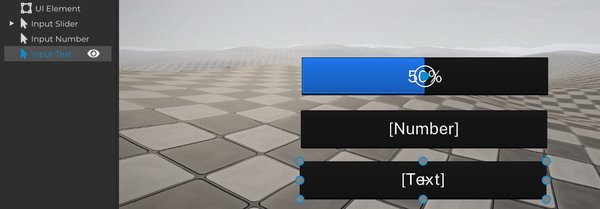
2. Testing the UI Toolkit Elements
Before testing the elements created with the UI Toolkit, if you are using Cave Engine’s third-person game template, disable the Player and the Vehicle in the scene.
This is important because one of these entities may take control of the mouse cursor while the game is running.
With the cursor free, you will be able to interact correctly with the interface elements, such as the Input Slider, Input Number, and Input Text, allowing you to test all their features without interference.
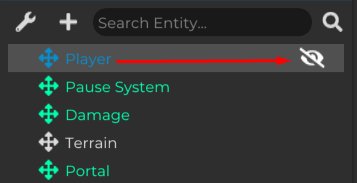
Run the game by pressing F5.
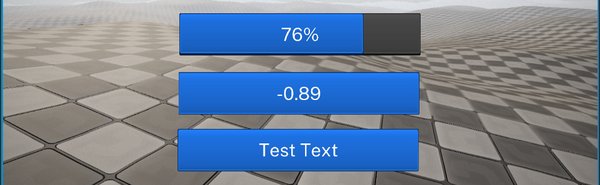
During execution, you will be able to interact with the created elements.
The Input Slider and Input Number allow you to modify their values through mouse interaction, while the Input Text allows you to type text directly into the interface.
This is a good moment to test each one and understand in practice what they are meant for.
For example:
- the Input Slider is great for settings such as volume or brightness
- the Input Number is useful for precise numeric values
- the Input Text is useful when the player needs to type information
3. Hierarchy
Now let’s see how hierarchy works between UI Elements.
Select the UI Element Default and, in the properties panel, adjust its Scale values.
By changing these values, you can increase or decrease the size of the element.
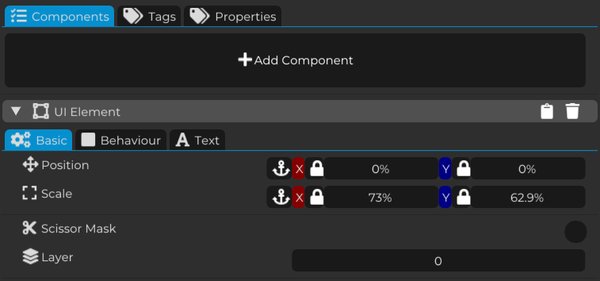
To create the parent-child relationship between the Entities, click and drag the UI Element you want to turn into a child and drop it on top of the UI Element Default, which will become the parent Entity.
This is the same hierarchy concept used throughout the engine: the child becomes attached to the parent and starts following it.
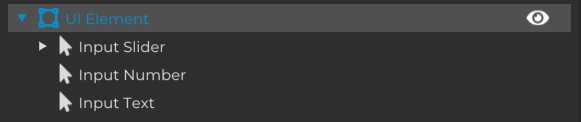
After creating this parent-child relationship, the child element will automatically follow the transformations of the parent element.
This means that changes such as position, scale, and visibility applied to the UI Element Default will also affect all of its child elements.
This is extremely useful when building menus and interface panels.
For example, if you create a menu panel as the parent and place multiple buttons, texts, and input fields as children, you can move or resize the entire menu by editing only the parent element.
Instead of adjusting every interface element one by one, you can organize them into groups, making the entire UI much easier to edit and maintain.
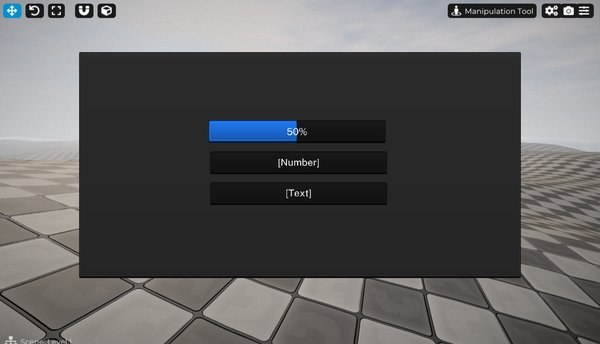
At this point, you have learned not only how to create and test UI Toolkit elements, but also how to organize them using hierarchy.
This is one of the most important concepts when building larger interfaces in Cave Engine, because it helps keep your UI cleaner, more modular, and much easier to manage.