Cave: Game User Interface (Game UI) System
Customizing UI Styles
Lesson 5 of 6 • 10 XP
Keep your place in this quest
Log in or sign up for free to subscribe, follow lesson progress, and access more learning content.
In this lesson, you will learn how to customize the visual appearance of UI Elements in Cave Engine.
We will see how to modify style properties such as colors, transparency, images, blur, and also how to create new UI Styles for your project.
UI Styles are useful because they allow you to reuse the same visual configuration across multiple UI Elements. This makes it easier to keep your interface consistent and organized.
1. UI Style
By default, when you create a UI Element Default in Cave Engine, it already comes with a UI Style assigned to it.
This style is called Default Style.
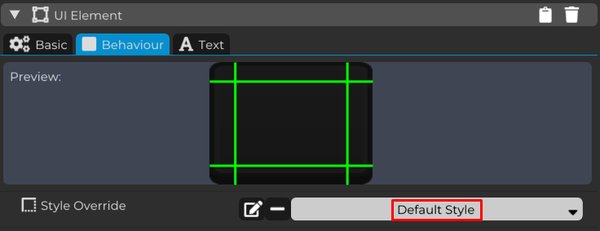
This style is responsible for defining the initial appearance of the UI Element.
You can find it inside the Interface folder in the Content Browser.
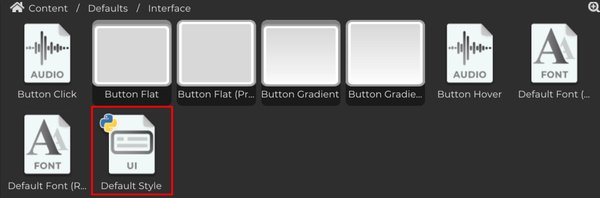
This means that any change made to the Default Style will automatically affect all UI Elements that are using that style through the Style Override property.
Because of that, it is a good practice to keep the Default Style as Cave Engine’s default interface style and create a new UI Style for your own project customizations.
This way, you can modify the appearance of your UI Elements without accidentally changing every element that still uses the default style.
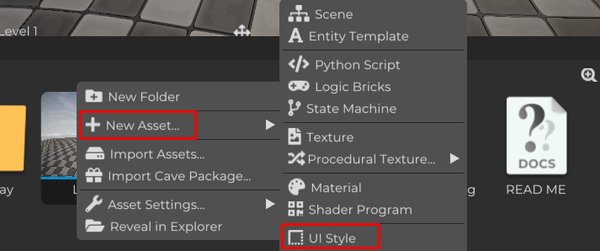
Select the UI Element and, in the Style Override property, replace the Default Style with the new UI Style we just created.
Now this UI Element will use your custom style instead of the default one.
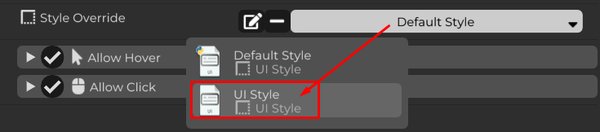
To edit the style, click the pencil icon next to the UI Style field.
You can also select the style file directly in the Content Browser to open the style editor.
2. Customization
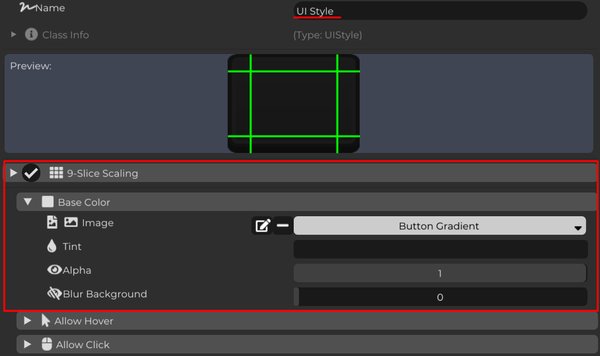
Inside the UI Style editor, you can customize the visual properties of the element.
The 9-Slice Scaling option allows you to resize a UI Element without distorting its borders and corners.
When enabled, the element is divided into nine regions. The four corners always keep the same size, the borders are stretched only in one direction, and only the center region is freely resized.
This is very useful for creating panels, windows, dialogue boxes, buttons, and other interface elements that need to support different sizes while preserving their visual quality.
Without 9-Slice Scaling, resizing a button or panel may stretch the entire image and distort the corners. With 9-Slice Scaling, the element can become larger or smaller while keeping the borders clean.
-
In the Image option, you can load a texture from your computer to be used as the visual appearance of the UI Element.
-
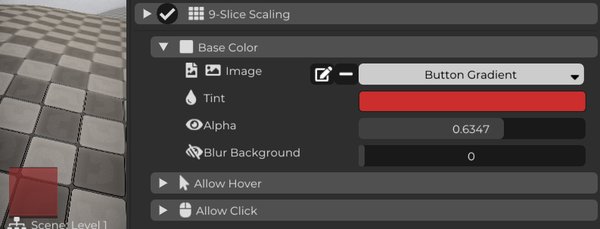
Tint allows you to change the color applied to the UI Element. It works like a color overlay over the image used by the element, allowing you to modify its appearance without editing the original texture.
-
Alpha controls the transparency level of the UI Element. Higher values make the element more opaque, while lower values make it more transparent.
-
Blur applies a blur effect to the background behind the UI Element. This can be useful for menus, popups, pause screens, dialogue windows, and panels that need to stand out from the game scene.
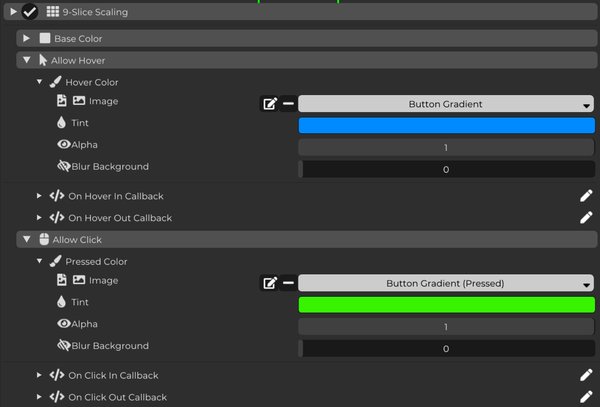
The same settings can also be applied to the Hover and Click states of the UI Element.
This means you can define a specific image, color, transparency, and blur value for each interaction state.
For example, a button can have one color when idle, become brighter when the mouse is hovering over it, and change again when clicked.
This gives the player clear visual feedback and makes the interface feel more responsive and polished.
At this point, you now understand how UI Styles control the appearance of UI Elements in Cave Engine.
By creating your own styles instead of editing the Default Style directly, you can keep your project organized, reuse visual configurations, and build interfaces with a consistent look across menus, buttons, panels, and HUD elements.