Cave: Game User Interface (Game UI) System
Understanding UI Anchors
Lesson 3 of 6 • 10 XP
Keep your place in this quest
Log in or sign up for free to subscribe, follow lesson progress, and access more learning content.
In this lesson, you will learn how to use Cave Engine’s UI anchoring system.
Anchoring allows you to define the reference point used by UI Elements on the screen. This is very important when creating interfaces that need to adapt correctly to different resolutions, window sizes, and aspect ratios.
By the end of this lesson, you will understand how to position UI Elements consistently, making sure they stay where you expect them to be regardless of the screen size.
1. Creating a New UI Element
Create a new UI Element Default.
After adding it to the scene, select it and look at the Properties panel.
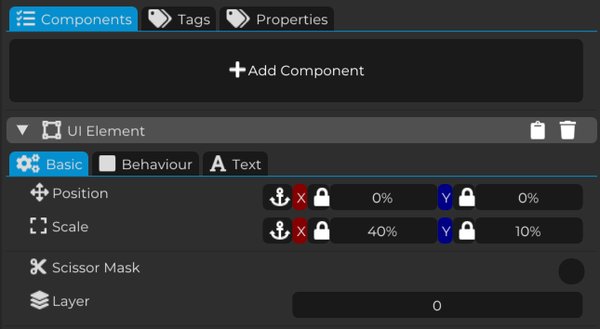
There, you will find the settings responsible for the element’s position, scale, appearance, and anchoring. In this lesson, we will use these properties to understand how the anchoring system works and how it affects the behavior of the interface.
2. Position
By default, the position of UI Elements in Cave Engine is defined in percentage values.
This helps you create interfaces that adapt better to different screen resolutions.
Initially, the UI Element is anchored to the center of the screen. Because of that, when the position values are set to 0, the element appears exactly in the center of the interface.
3. Scale
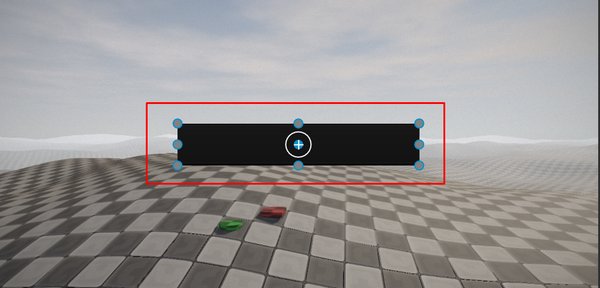
Just like position, the scale of UI Elements in Cave Engine is also defined in percentage values by default.
By changing the scale values, you can increase or reduce the size of the UI Element directly on the screen.
This makes it easy to adjust the dimensions of the interface while keeping it responsive.

4. Percentage and Absolute Pixel Values
As we saw previously, by default, the position and scale of UI Elements in Cave Engine are defined using percentages.
In most cases, this is the recommended behavior, because it helps the interface keep its position and size consistent regardless of the resolution or monitor size.
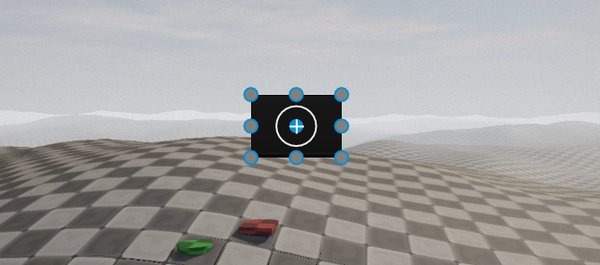
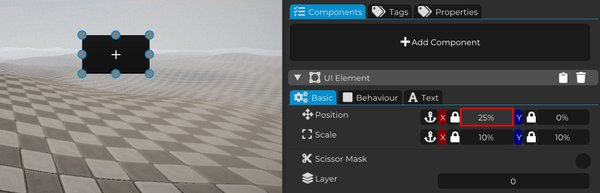
In this example, we set the scale of the UI Element to 10% on both the X and Y axes. We also set the position to 25% on the X axis, which corresponds to the horizontal axis.
With this setup, the element is moved 25% to the right relative to its anchor point.
Because the values are defined in percentage, this positioning will be preserved independently of the resolution or monitor size, keeping the interface consistent across different devices.
Besides percentage values, Cave Engine also allows you to use absolute values in pixels.
This mode is useful when you need a UI Element to have a fixed size or fixed position.
To change the unit type, click the lock icon next to the Position or Scale axis you want to modify.
When you do this, the value will switch between percentage (%) and absolute pixels (px), allowing you to choose the most appropriate unit for each situation.
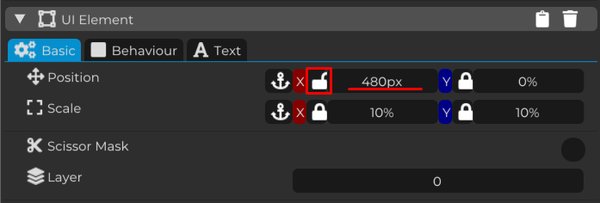
When using an absolute pixel value, the UI Element will no longer adapt proportionally to the screen resolution.
This means that, no matter if the game is running on a low-resolution or high-resolution monitor, the pixel value will be applied exactly as configured.
The same behavior applies to the Y axis of the position and to both X and Y axes of the scale.
This mode is recommended when you need an element to keep a fixed size or fixed position, without considering the width and height of the screen or of its parent UI Element.
For example, you may want an icon to always be exactly 64 pixels wide, or a small margin to always be exactly 20 pixels from the border.
5. Position Anchoring
The anchor icon available in the Position and Scale properties indicates the anchor point of the UI Element.
When you click the Position anchor icon, the Anchor Point window will be displayed. There, you can see the current anchor point of the element.
By default, new UI Elements are anchored to the center of the screen, represented by the blue circle in the configuration window.
This anchor point works as the reference for positioning the element in the interface. From this point, the position values will be applied according to the selected anchor.
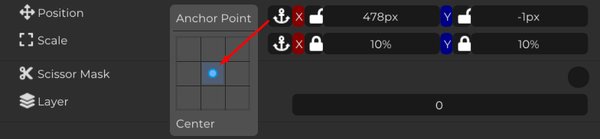
Imagine you want to create a minimap, which is usually placed in the bottom-left corner of the screen.
In this case, keeping the element anchored to the center does not make much sense, because its position would be calculated from the center point of the screen.
For this type of interface, simply change the Anchor Point to the desired bottom corner.
This makes the element use that region of the screen as its reference, making it easier to position and ensuring it remains in the correct place regardless of the resolution being used.

When the Position values are set to 0, either using percentage (%) or absolute pixels (px), the UI Element will be positioned exactly over its anchor point.
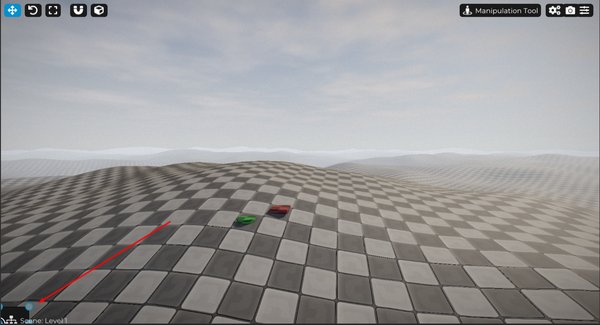
In other words, the Anchor Point becomes the reference for the element’s position.
From that point, you only need to adjust the position values to move the element in the desired direction.
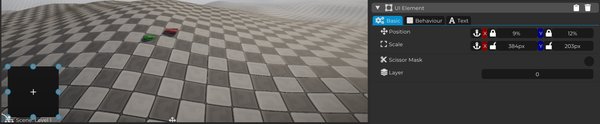
6. Scale Anchoring
Now let’s understand how scale anchoring works.
To do this, change the UI Element’s anchor point back to the center of the screen and set the Position values to 0, making the element return exactly to the center.
With the element centered, it becomes easier to see how anchoring affects scale behavior and to understand from which point the UI Element will be resized.
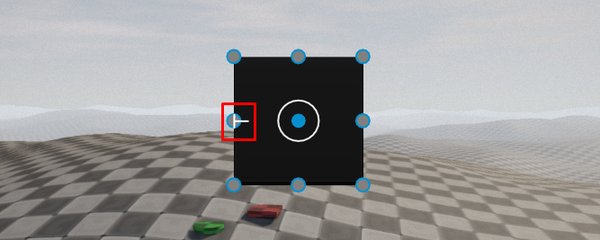
When the scale anchor point is set to the center, increasing or decreasing the element’s scale will affect both sides equally. The element will grow or shrink to the left and to the right at the same time.
However, in some situations, this is not the desired behavior.
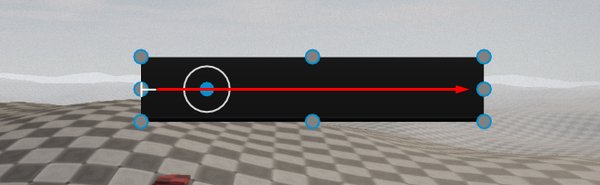
Imagine, for example, a health bar or progress bar. In that case, you usually want the element to grow or shrink in only one direction.
To achieve that, change the scale anchor point to the desired side.
When you do this, a small cursor will be displayed, indicating the point from which the scale will be applied.
Now, when you increase or reduce the scale, the element will grow only in the opposite direction of the anchor point. This makes it much easier to create bars and other dynamic UI elements.
7. Adjusting the Anchor and Scale
Now that we understand how the scale anchor point affects the resizing behavior of the element, we can configure the interface in the way that best fits our project.
Return the position anchor to the bottom-left corner of the screen, or choose any other position that makes more sense for the interface you are creating.
You can do the same with the scale anchor, defining the point from which the element will be resized.
In this example, we will use absolute pixel values for the X axis of the position and for the X axis of the scale, while keeping percentage values for the Y axis.
This setup allows the element to maintain a square proportion regardless of the screen dimensions, while still preserving responsive behavior on the vertical axis.

At this point, you should have a good understanding of how UI anchoring works in Cave Engine.
Anchors are one of the most important parts of interface creation, because they define how UI Elements behave when the screen size changes.
By combining position anchors, scale anchors, percentage values, and pixel values, you can create interfaces that are both precise and responsive.