Visual Scripting Tutorial (Logic Bricks)
Creating a Collectable Item
Lesson 5 of 10 • 10 XP
Keep your place in this quest
Log in or sign up for free to subscribe, follow lesson progress, and access more learning content.
In this lesson, we will prepare the item that will be used as a collectable object in the game.
We will configure its visual mesh, apply a material and texture, add the collision needed for interaction with the Player, define an identification tag, and create a simple movement logic to make the item more visible and attractive inside the scene.
Collectable items are very common in games. They can represent coins, keys, health pickups, ammo, power-ups, quest objects, or anything else the Player can touch and collect. In this lesson, we will focus on preparing the item itself. Later, the Player logic will be able to detect this item and collect it.
1. Creating the Item
Inside the Content panel, create a new Asset of type Entity Template.
This Entity Template will be used as the base for our collectable item. Since collectable items are usually reused many times across a level, creating it as an Entity Template is the correct approach. This way, you can place multiple instances of the same item in the scene, and if you later change the template, all instances can be updated from the same source.
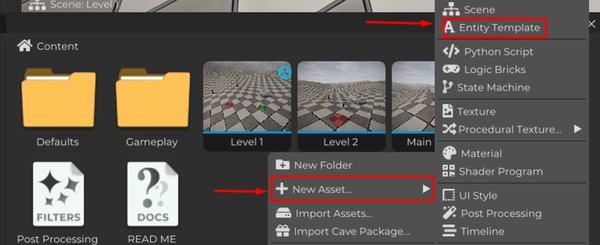
Open the Entity Template so we can edit it.
Then rename the Entity to Item and create a new Mesh, which will be responsible for the visual representation of the object.
In the Components section, add a Transform component. The Transform gives the Entity access to position, rotation, and scale properties, which are necessary for placing and manipulating the item in the 3D world.
After that, also add a Rigid Body component. This component will be responsible for the physics and collision behavior of the item inside the scene.

In the Rigid Body component, enable the Ghost option.
With this option enabled, the item will still be able to detect collisions and interactions, but it will not physically block the movement of the character.
This is exactly what we usually want for collectable items. The Player should be able to walk through the item, and the game should detect that contact as an interaction. If the item had a regular solid collision, it could block the Player or push objects around, which is usually not the desired behavior for pickups.
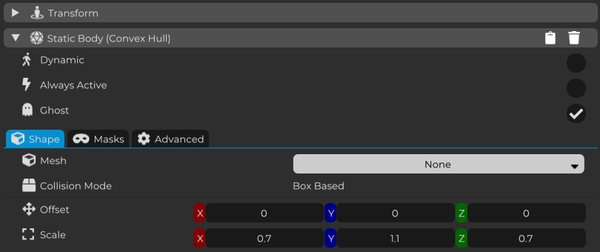
At this point, you can import a 3D model into Cave and use it as the Mesh of your item.
In this example, we will use only a 2D icon created from a texture, so it will not be necessary to import a custom model. But feel free to customize the visual appearance of the item however you prefer, depending on the needs of your project.
For example, you could use:
- a coin model
- a key model
- a potion bottle
- a floating crystal
- a power-up icon
- a simple textured plane
Now, just like we created the Entity before, create a new Material inside the Content panel.
Then configure it according to the visual style you want for your game, adding the necessary textures, such as Albedo, Normal Map, or any other maps you want to use.
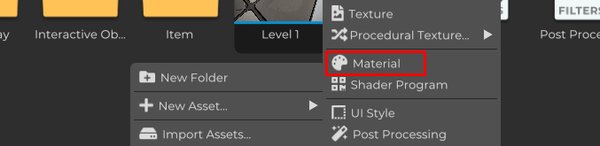
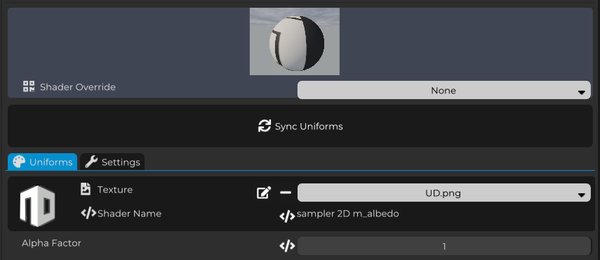
After configuring the material, apply it to the Mesh of the item to define how it will look inside the scene.
The Mesh defines the shape that will be rendered, while the Material defines how that shape will appear visually, including its color, texture, roughness, normal information, and other shader-related properties.
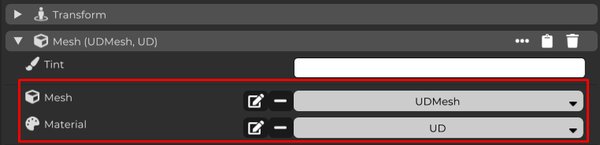
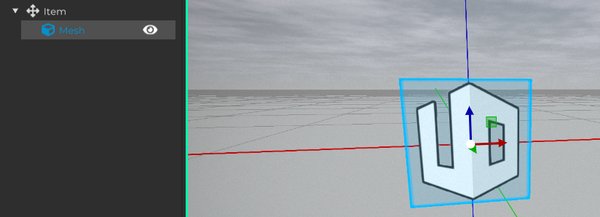
For organization purposes, the Content panel allows you to freely create folders to better structure the assets of your project.
A good practice is to create a folder called Item and move all files related to this collectable into it, such as the Entity Template, materials, textures, and any other resources used by this object.
Keeping your assets organized makes it easier to navigate the project, improves your workflow, and makes maintenance much simpler as the game grows.
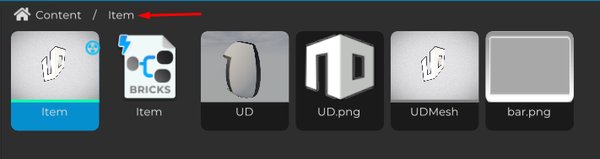
Now let’s create a new Logic Brick for our item.
This Logic Brick will be responsible for adding a continuous rotation to the object, making it easier for the player to notice it in the scene.
This type of movement is very common in collectable items. A completely static object can be harder to see, especially in a busy environment. A simple rotation helps the item stand out and immediately communicates that it is something special or interactive.

To do this, we will simply get the Entity and access its Transform.
Then add the Rotate On Yaw node, which is responsible for applying rotation around the Y axis, the vertical axis of the object.
In the Radians field, define the value you want to use as the rotation speed. The higher this value is, the faster the item will rotate.
Finally, connect the Transform to Rotate On Yaw and execute this logic through On Update, so the item rotates continuously during the game.
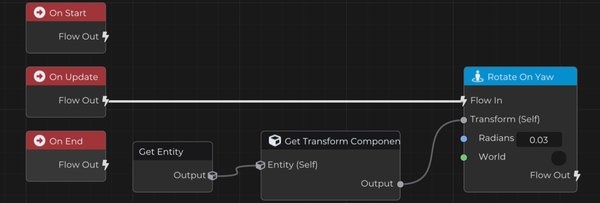
Finally, let’s add a Tag to our item so it can be identified by the Player collection logic later.
Select the Tags tab, create a new tag called item, and assign it to the collectable Entity.
Later, we will use this tag to detect when the Player touches the object. This makes it easy to identify which Entities are collectable items, without depending only on their name or visual appearance.
Using a tag is a clean and flexible approach because your project may eventually have many different collectable objects. As long as they all have the item tag, the Player logic can recognize them as collectables.
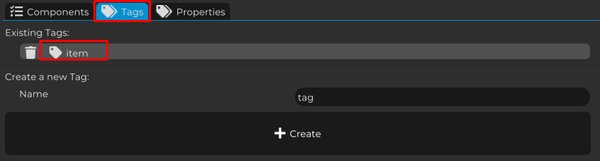
At this point, the collectable item is ready to be used in the scene.
It has a visual representation, a material, ghost collision for detection, a Logic Brick to make it rotate, and an item tag that will allow the Player to recognize it later.