Cave: Game User Interface (Game UI) System
Using Text in the UI
Lesson 6 of 6 • 10 XP
Keep your place in this quest
Log in or sign up for free to subscribe, follow lesson progress, and access more learning content.
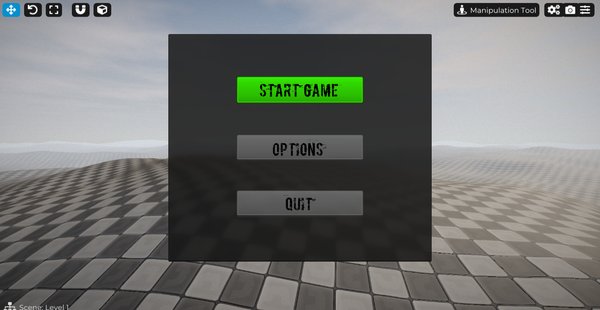
In this lesson, you will learn how to use text in Cave Engine’s interface system.
Text is one of the most important parts of any UI. It is used for button labels, menu titles, subtitles, instructions, HUD values, item counters, dialogue boxes, settings labels, and many other interface elements.
We will see how to create text elements, configure their appearance, and adjust properties such as font, size, color, spacing, alignment, and anchoring.
1. Preparing the Place for the Text
Before adding the text elements, let’s prepare the interface structure where they will be displayed.
In this example, we will create a simple main menu for a game, containing three buttons:
- Start Game
- Options
- Quit
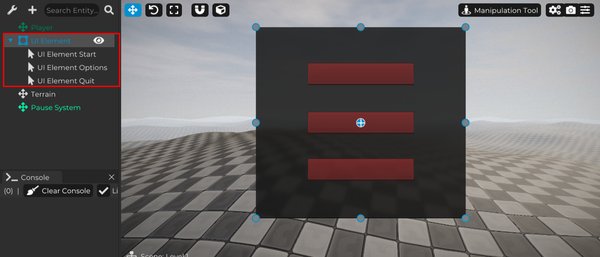
To do this, create a new UI Element, which will be used as the parent element and will serve as the background for the menu.
Then duplicate one of the buttons created previously until you have three buttons, and make all of them children of this UI Element.
This keeps the buttons organized inside a single hierarchy, making positioning, editing, and future interface changes much easier.
2. Adding Text
Now create a UI Element of type Text and make it a child of the Start button.
Then adjust the scale of the text element until it has a good size for the interface.
Because the text is a child of the button, it will automatically follow the button’s position. This makes the interface easier to organize and helps keep the label properly aligned with the button.
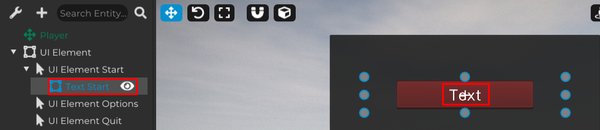
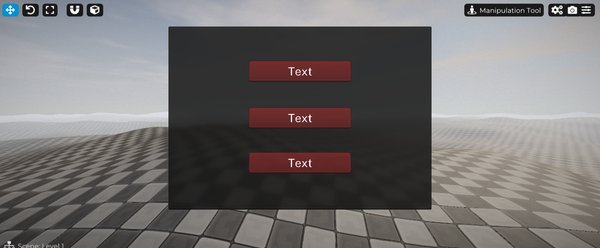
Repeat the same process for the other buttons in the menu.
Create one Text UI Element for the Options button and another one for the Quit button, making each text element a child of its corresponding button.
This way, each button has its own label, and the entire menu remains organized through the parent-child hierarchy.
3. Text Settings
Select the text UI Element we created for the Start button.
In the Text tab, you will find all the properties responsible for configuring the text content and its visual appearance.
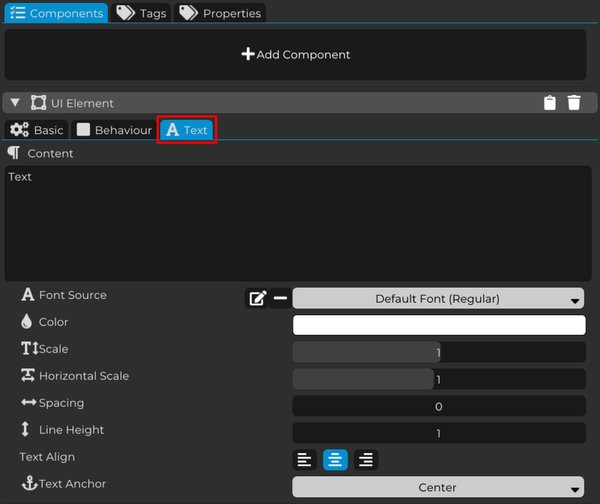
The Content property defines the text that will be displayed by the UI Element.
Simply type the desired content in this field and it will be shown in the interface.
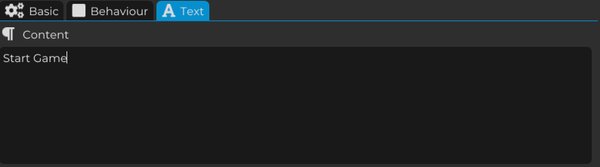
In this example, we will use the text Start Game to identify the button that starts the game.
- Font Source
The Font Source property allows you to select a font and change the appearance of the text.
You can load a compatible font and use it directly in the UI Element, making it easier to match the typography of your game’s visual identity.
- Color
The Color property allows you to change the color of the text.
This is useful for adapting the text to the style of the interface, improving readability, or creating visual contrast against the background.
- Scale
The Scale property controls the general scale of the text, increasing or reducing its size.
Use this to make the text more readable or to better fit the size of the button, panel, or interface area where it is placed.
- Horizontal Scale
The Horizontal Scale property adjusts only the horizontal scale of the text.
This allows you to make the text narrower or wider without changing its height.
- Spacing
The Spacing property controls the space between characters.
You can use it to bring letters closer together or move them farther apart, improving readability or creating a specific visual style.
- Line Height
The Line Height property defines the spacing between lines of text.
This is used when the content has two or more lines, such as descriptions, dialogue text, instructions, or longer interface messages.
- Text Align
The Text Align property defines how the text lines are aligned inside the element.
This is especially useful when the text has multiple lines, allowing you to align them to the left, center, or right.
- Text Anchor
The Text Anchor property defines the anchoring of the text inside the UI Element.
It determines which point is used as the reference for the text alignment. With this option, you can position the text in the center, corners, or sides of the UI Element depending on what your interface needs.
4. Customizing the Text
Now edit the text elements in the way that best fits your project.
Use the properties presented earlier to configure the font, color, scale, character spacing, line height, alignment, and anchoring.
With these options, you can create different text styles and adapt the interface to the visual identity of your game.
For example, menu buttons can use a large and readable font, while descriptions and secondary labels can use smaller text with softer colors.
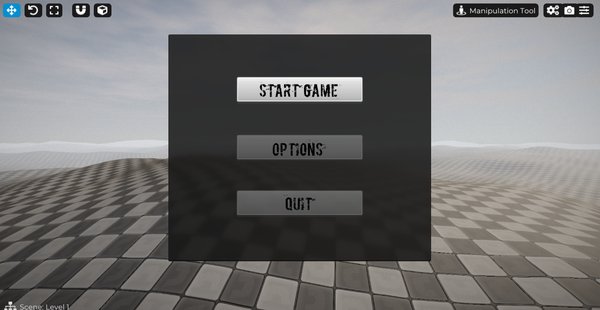
With everything you learned in this Quest, you now have the foundation needed to create complete interfaces in Cave Engine.
You can freely edit UI Elements, customize text, create and modify UI Styles, organize UI hierarchy, configure anchoring, and use Callbacks to execute custom logic.
As an exercise, you can replace the print messages created during the previous lessons with real actions from your project.
For example, you can make the menu buttons actually start the game, open the options menu, or close the application.
The structure is now ready for you to keep exploring the UI system and develop more complete, polished, and interactive interfaces.