Cave: Guia de Introdução
First Look at the Editor
Lesson 3 of 19 • 10 XP
Keep your place in this quest
Log in or sign up for free to subscribe, follow lesson progress, and access more learning content.
When a Cave project opens, you are placed inside the Cave Editor: the place where you build scenes, organize assets, edit objects, test gameplay, and prepare your game for export.
At first, the editor may look like a lot. Do not try to memorize every panel right away. The important thing is to understand what each main area is for, because you will use the same few tabs constantly while building your game.
This lesson is a guided tour of the editor interface.
The Editor Window
At the top of the window, Cave shows the engine name, the editor mode, and the currently opened project.
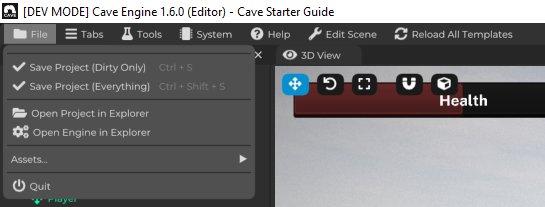
Below that, you will find the main editor menus. The most important ones for now are:
| Menu | What it is for |
|---|---|
| File | Saving the project, opening folders, importing/reimporting assets, and quitting the editor. |
| Tabs | Reopening editor panels that were closed or hidden. |
| Tools | Once you have custom Python Tools registered, they will appear here. |
| System | Some advanced system settings. |
| Help | you can quickly get access to Cave Engine's Python API, download the demo project, or join our Discord server, etc. |
| Edit Scene | To quickly edit your scene. |
| Reload All Templates | As the name suggests, reload all templates. We'll understand what's that soon. |
| Play button | Starting and stopping Play Mode. |
| --- |
The editor is divided into tabs. A tab is a panel such as the 3D View, Scene Graph, Properties, Asset Browser, Console, or Settings.
You can drag tabs around, resize them, dock them into different areas, and close tabs you are not using. Cave remembers your editor layout, so you can arrange the workspace in a way that feels comfortable and keep working with that layout later.
If you close something by accident, use the Tabs menu to open it again.
Let's explore all the main Tabs:
The 3D View
The 3D View is the main place where you see and edit your world.
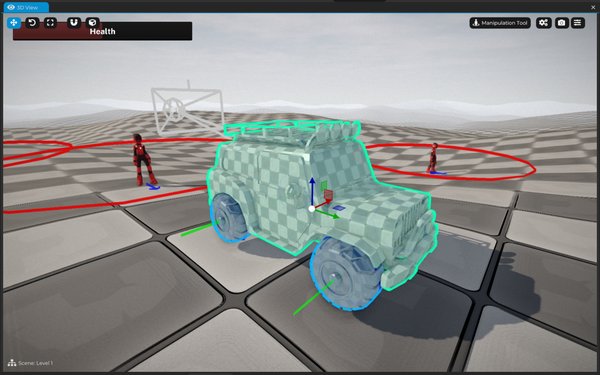
This is where you can:
- Look around the current scene.
- Select entities by clicking them.
- Move, rotate, and scale entities.
- Preview your level, entity templates, cameras, lights, UI, and gameplay.
- Use editor tools such as manipulation, terrain editing, geometry painting, and paths.
- Start Play Mode and test the game.
Most of your level editing happens here.
The 3D View is interactive. You are not just looking at a render of the scene. You are editing the real objects that belong to your project.
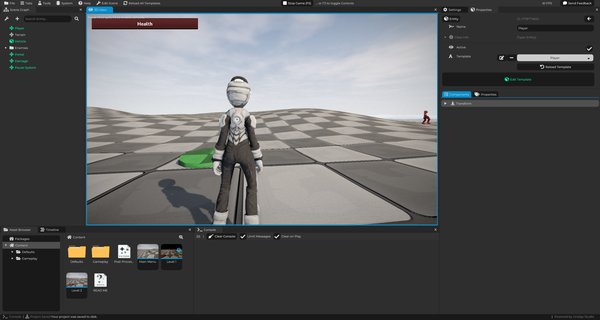
The Scene Graph
The Scene Graph shows the hierarchy of entities in the current scene or entity template.
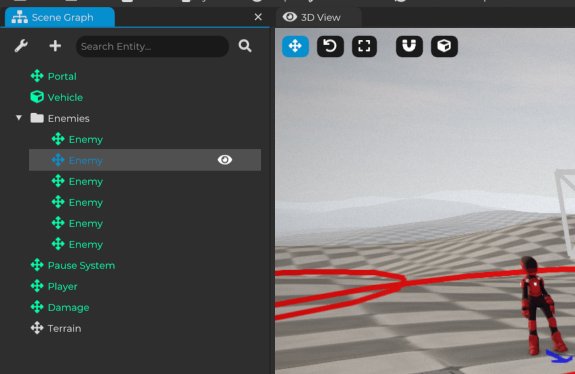
An entity is an object in your game. It can be something visible, like a character or a wall, or something invisible, like a spawn point, trigger, folder, or logic object.
In the Scene Graph, you can:
- See every entity in the active scene.
- Select entities by clicking them.
- Expand and collapse entity hierarchies.
- Parent one entity to another by dragging it.
- Use folders to organize your scene.
- Right-click entities to access editing actions.
- Open scene settings with the settings button in the tab.
The hierarchy matters because children follow their parents. If a weapon is parented to a character, or a light is parented to a moving object, the child stays connected to that parent.
Good scene organization makes a big difference as your game grows. You do not need a perfect hierarchy from the start, but you should get used to naming and grouping objects clearly.
The Properties Tab
The Properties tab shows the settings for whatever is currently selected.
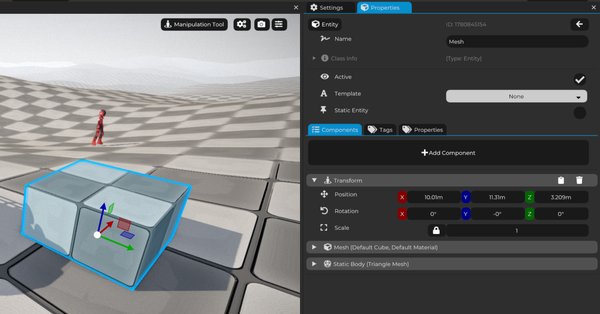
Depending on your selection, it can show:
- Entity settings.
- Transform values.
- Components.
- Asset settings.
- Scene settings.
- Class or internal object information.
For example, if you select a mesh entity, the Properties tab lets you edit its transform and its mesh-related settings. If you select a material in the Asset Browser, the Properties tab shows the material settings instead. Notice that this is not "only for Entities", but for all Asset types. We will understand Cave's Assets a bit better soon.
This tab is where you usually change the details of something after selecting it somewhere else.
The general workflow is:
- Select something in the 3D View, Scene Graph, or Asset Browser.
- Look at the Properties tab.
- Edit the settings you need.
If nothing is selected, the Properties tab will not have much to show.
The Asset Browser
The Asset Browser is where your project content lives.
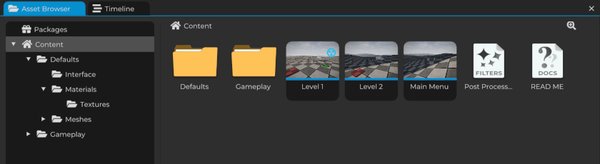
Assets are reusable pieces of your project, such as:
- Scenes.
- Entity templates.
- Meshes.
- Materials.
- Textures.
- Audio.
- Python scripts.
- Logic bricks.
- State machines.
- Timelines.
- Shaders and post-processing assets.
The Asset Browser has a folder tree and a thumbnail area. You can use it to organize, open, select, rename, duplicate, move, delete, import, and export assets.
> You can also drag supported files from your computer into the Asset Browser to import them into the project.
When you click an asset, its settings appear in the Properties tab. When you double-click a folder, the Asset Browser opens that folder. Some assets can also be double-clicked to open or edit them.
Think of the Asset Browser as your project's library. The Scene Graph shows what is currently placed in the scene. The Asset Browser shows what your project owns and can reuse.
The Console
The Console is Cave's feedback log.
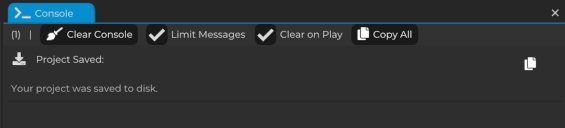
It displays messages from the engine and from your project, including:
- Regular information messages.
- Warnings.
- Errors.
- Save messages.
- Script prints.
- Import messages.
When something does not behave the way you expected, check the Console early. It often tells you what Cave tried to do and what went wrong.
The Console also has a clear button and can be configured to clear automatically when you start Play Mode.
The Settings Tab
The Settings tab contains project-wide options.
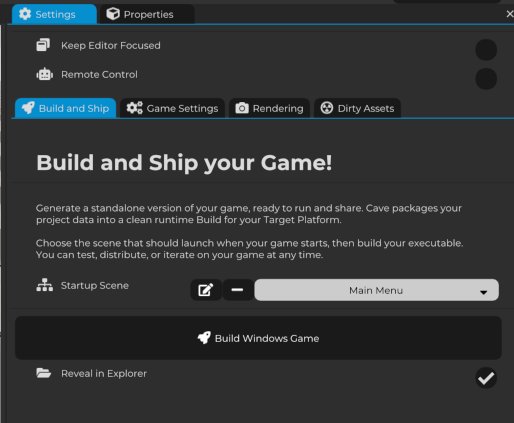
This is where you will find settings related to:
- Building and shipping the game.
- Choosing the startup scene.
- Game settings.
- Rendering settings.
- Testing the project as a standalone runtime.
You do not need to configure everything immediately. Early on, the Settings tab is most useful when you want to test the game as a standalone player or prepare the project for exporting later.
The Timeline Tab
The Timeline tab is used to create and edit timeline-based sequences.
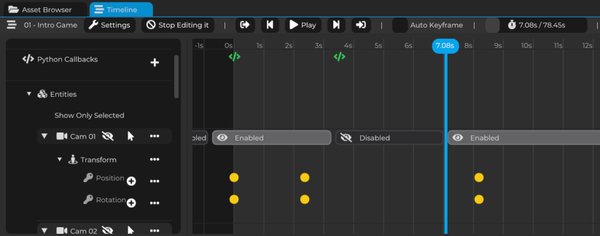
Timelines can be used for things like:
- Cutscenes.
- Camera sequences.
- Scripted events.
- Animated object changes.
- Transform and component keyframes.
If no timeline is currently open for editing, the tab will simply tell you to open a Timeline asset and click Edit.
You will not need timelines in the first few minutes of using Cave, but they become useful when you want authored sequences instead of only code or gameplay logic.
Other Useful Tabs
Cave includes more tabs than the ones you see all the time. Some are hidden or only opened when needed.
Useful tabs include:
| Tab | What it is for |
|---|---|
| Text Editor | Editing text-based assets such as scripts. |
| Finder | Searching for things in the project (you can press Ctrl + F to quickly open it). |
| Audio Monitor | Inspecting audio activity. |
| Joystick Preview | Checking controller input. |
| Profiler | Inspecting performance behavior. |
| Statistics for Nerds | Viewing detailed runtime/editor statistics. |
| Timeline Preview | Previewing timeline output Camera (if any). |
| --- |
You do not need all of these right now. The core tabs to remember are 3D View, Scene Graph, Properties, Asset Browser, Console, and Settings.
A Simple Mental Model
Here is the editor in one sentence:
The Asset Browser stores your project content, the Scene Graph shows what is currently in the scene, the 3D View lets you edit it visually, and the Properties tab lets you change the selected object's details.
That is enough to start building.