Cave: Getting Started Guide
Understanding Scenes
Lesson 8 of 19 • 25 XP
Keep your place in this quest
Log in or sign up for free to subscribe, follow lesson progress, and access more learning content.
A scene is the world, level, menu, or gameplay space that Cave is currently editing or playing. If the Asset Browser is your project's library, a scene is one place where you use that library to build something playable.
In this lesson, you will learn what scenes store, how to select the scene itself, and which scene-level settings you are likely to meet early on. You do not need to tune every setting right away, but understanding what belongs to the scene will make the rest of the editor feel much more organized.
What Is a Scene?
A Scene is an asset that stores a collection of entities.
Scenes can represent many things:
- A gameplay level.
- A main menu.
- A pause menu.
- A test room.
- A prototype arena.
- A cutscene space.
- Etc...
When you open or edit a scene, its entities appear in the Scene Graph and its world appears in the 3D View.
Scenes Store Entities
Everything placed in a scene is an entity.
A scene can contain players, enemies, cameras, lights, props, terrain, triggers, ui elements, audio sources, logic objects, folders used for organization, etc. In other words: the scene is the container and the entities are the objects inside it.
Selecting the Scene
Most of the time, you select entities, but sometimes you need to select the scene itself.
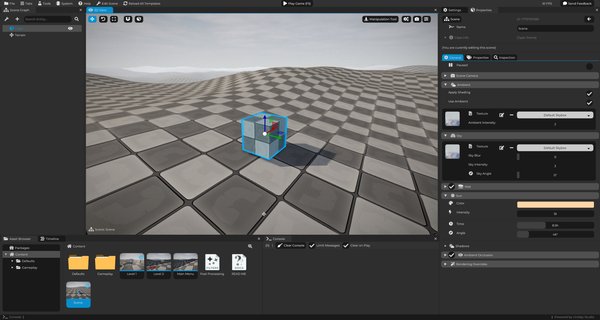
To do that, click the background or sky in the 3D View, it will select the scene asset and then Cave can show the current scene in the Properties tab. You can also open scene settings from the Scene Graph using the scene settings button and last but not least, if you simply click once the scene asset in the Asset Browser, it will be selected.
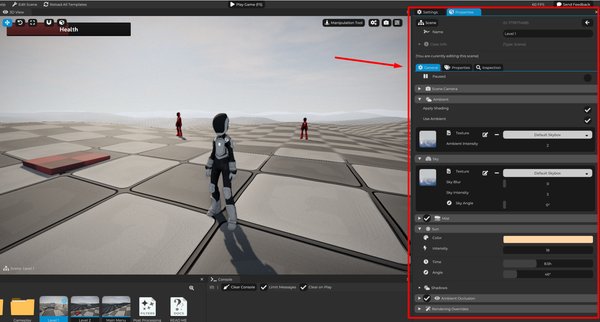
Scene-level settings are different from entity settings. They affect the whole scene instead of one object. So let's explore a few of them.
Scene Camera and Preview Settings
Each scene has a default scene camera. This camera is used as the fallback view when no Camera Component is actively controlling the game view.
And to be more precise, all that an entity's camera components do when active is updating the camera from the scene so it can be later on used to render your world. But it's worth remembering that most of the times, this is not the camera that you want to manipulate. You probably want to have an entity with a camera component and use it instead. Unless you are doing some in-game logic that you need to get the camera to do some calculation and it does not matter which camera it is, then because then you can use the scene camera directly. But overall, that's not what you want.
For an actual gameplay camera, you will usually create an entity with a Camera Component. That camera can then become the active game camera during play.
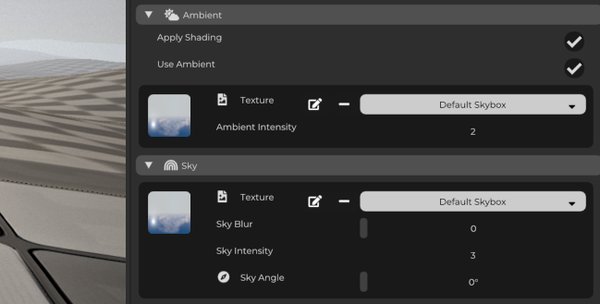
Ambience and Sky Settings
Scenes also control the general mood of the world. In the scene rendering settings, you can find options for ambience and sky:
Ambienceaffects the general environmental light in the scene. It helps keep objects from looking completely black when they are not directly hit by a light.Skysettings control the background and sky lighting behavior. Depending on the project setup, the sky can use a procedural sky texture or an imported skybox image.
These settings are not just decorative. They strongly affect how a level feels.
For example:
- A bright blue sky makes an outdoor scene feel open.
- A dark sky with low ambient light can make a cave feel dangerous.
- A warm sky can make a sunset area feel calm or cinematic.
Sun and Lighting Settings
The scene can also control sun lighting, which is useful for broad directional light, especially in outdoor levels. By design, Cave is meant to only have one sunlight in your scenes.
Sun settings affect things like the sun direction, light color, strength and intensity and shadow behaviour.
You can still place local lights as entities, such as point lights or spot lights. The sun is for global directional lighting, while entity lights are for specific areas and objects.
Mist and Fog Settings
Mist is a scene-level atmospheric effect. It can help with depth, mood, visibility, distance fading, outdoor atmosphere, or even a cave or a dungeon ambience.
Mist settings include values such as color, intensity, start distance, distance range, and falloff. Used lightly, mist can make a scene feel more natural. Used heavily, it can create stylized, mysterious, or horror-like spaces.
Ambient Occlusion
Ambient occlusion is a rendering effect that darkens tight corners and contact areas, it helps objects feel grounded in the world.
For example, ambient occlusion can add subtle shadowing:
- Where a crate touches the floor.
- In the corners of a room.
- Around rocks and terrain details.
- Between close objects.
You do not need to tune all of them immediately, but it's good to know that Cave already provides a decent Ambient Occlusion for your games out of the box.
Rendering Overrides (Advanced)
A scene can override some rendering behavior. Depending on the project setup, this can include:
- Post-processing overrides.
- Main shader program overrides.
- Scene-specific visual settings.
This means one scene can look different from another without forcing the whole project to use the same rendering setup.
Practical examples:
- A main menu can have a stylized post-processing setup.
- A cave level can use heavier mist and darker ambience.
- A dream sequence can use a special shader or color treatment.
This is more advanced than placing entities, but it is useful to know that scenes can define their own visual identity.
Think about the Scenes as Levels
The most common way to think about scenes is as levels! But of course, scenes are not only for final levels. They are also useful for smaller development workflows.
You can create temporary scenes for:
- Testing a door system.
- Prototyping combat.
- Trying a vehicle.
- Building a UI flow.
- Testing lighting.
- Experimenting with imported assets.
This keeps experiments away from the main game scene until they are ready.
Starter Project Examples
Starter projects can include multiple scenes and level examples depending on the template and options chosen when creating the project.
You may see:
- Terrain.
- Player spawn areas.
- Portals for level changing.
- Enemy examples.
- Damage examples.
- Vehicle examples.
- UI and menu scenes.
These scenes are working examples. Select objects, inspect their components, check the assets they reference, and test them in Play Mode.
That is one of the fastest ways to learn how real Cave scenes are assembled.
A Simple Rule
- Use scenes for places.
- Use entities for objects inside those places.
- Use assets for reusable content that scenes and entities can share.
- Once this separation feels natural, building in Cave becomes much easier.