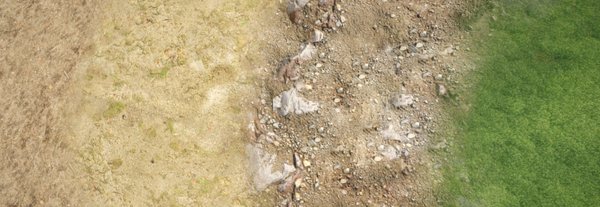
Cave: Terrain System Introduction
Creating Materials and Organizing Layers
Lesson 4 of 6 • 10 XP
Keep your place in this quest
Log in or sign up for free to subscribe, follow lesson progress, and access more learning content.
In this lesson, you will learn how to create and configure terrain materials in Cave Engine, and how to organize the Terrain Layers that will later be used to paint different textures over the terrain.
This is an important step because a terrain usually needs more than one surface type. For example, you may want grass in open areas, dirt on paths, rocks on slopes, mud near water, or sand in dry regions.
Before painting those surfaces, we first need to prepare the materials and organize the layers correctly.
1. Creating the Materials
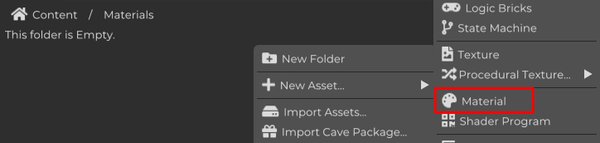
To keep the project organized, start by creating a folder inside the Content panel dedicated to the terrain materials.
Then create a new material, which will be used as the base material for the terrain.
During this process, it is important to use clear and descriptive names for all materials you create. Good organization will make it much easier to identify each material later when configuring the Terrain Layers, avoiding confusion when assigning the different textures that will be painted on the terrain.
For example, instead of using generic names like Material_01 or Texture_A, use names such as Grass_Material, Rock_Material, Dirt_Material, or Sand_Material.
2. Importing the Textures
The next step is to import the textures that will be used by the terrain materials.
Try to use textures with good quality, but also make sure they are appropriate for the needs of your project.
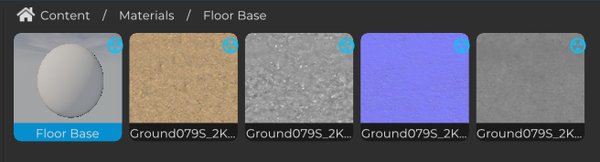
To import the textures, select the desired files on your computer and drag them into the folder where your terrain materials are located, inside Cave Engine’s Content panel.
In most cases, textures between 1K and 2K resolution offer a very good balance between visual quality and performance.
Avoid using very large files without a real need, because they increase memory usage and can impact the performance of the project. Whenever possible, prioritize optimization and use only the resolution necessary to achieve the visual result you want.
3. Configuring the Material
After importing the textures, select the material created previously.
Then click and drag each texture into the corresponding slot in the material editor.
Start by assigning the Diffuse texture, also commonly called Albedo or Base Color. This texture is responsible for the main appearance and colors of the terrain surface.
Then add the Normal Map texture. The Normal Map simulates small surface details and relief through lighting, giving the impression of depth without increasing the amount of geometry.
In some cases, it is also recommended to use a Roughness texture. Roughness controls how rough or smooth the surface is, affecting how light is reflected by the material and helping create a more realistic result.
Before continuing, make sure each texture was assigned to the correct slot.
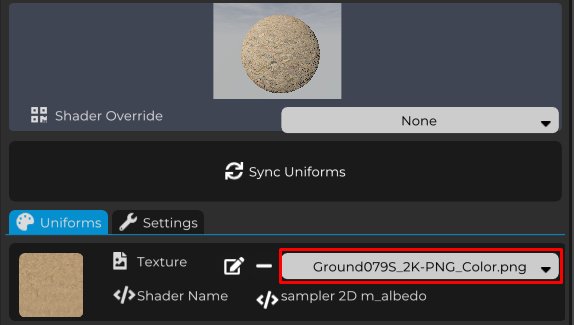
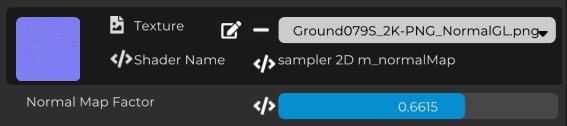
Each texture assigned to the material has settings that allow you to control its influence on the final result.
By adjusting these values, you can increase or reduce the effect of each map depending on the needs of your project.
For example, in the case of the Normal Map, the influence parameter controls the intensity of the simulated relief. Higher values make the surface details more visible, while lower values create a more subtle effect.
Adjusting this intensity is important to achieve a natural result that matches the visual style of the environment.
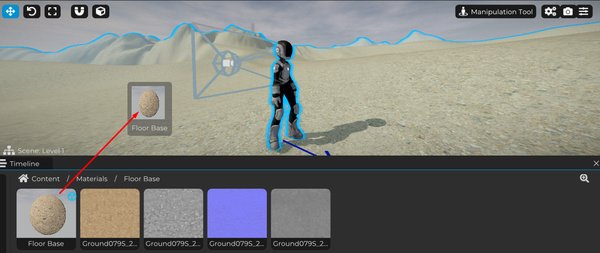
To apply the material to the terrain, click the material in the Content panel and drag it into the 3D View.
Then drop it over the terrain so the material is automatically assigned to it.
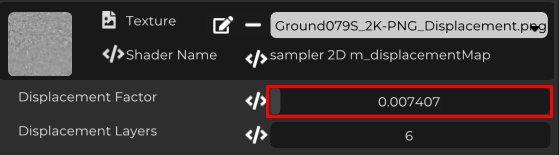
Another texture that can create a very interesting result is the Displacement map.
When using it, you can adjust the Factor value, which controls the intensity of the surface displacement.
Different from the Normal Map, which only simulates relief through lighting, Displacement modifies the terrain geometry itself, creating a more convincing three-dimensional effect.
Use this feature with moderation. Very high values can cause unwanted deformation and distortion on the surface.
When configured correctly, Displacement adds an extra level of depth and realism to the material, making the terrain visually richer.
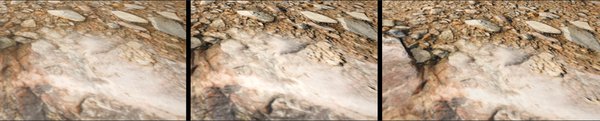
The image below shows a comparison between the different stages of the material setup:
Diffuse → Diffuse + Normal Map → Diffuse + Normal Map + Displacement
Now repeat this process to create all materials that will be used on the terrain of your project.
Plan in advance which surface types will be necessary, such as dirt, grass, mud, rocks, gravel, sand, or any other material that makes sense for the environment you are building.
It is also important to choose textures that work well together. Using materials with similar style, colors, scale, and detail level helps create a more cohesive, natural, and visually pleasant environment.
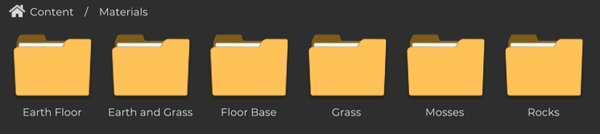
4. Organizing the Layers
After creating the materials, the next step is to configure the Terrain Layers, which will later be used to texture and paint the terrain.
Select the terrain and, in the Terrain Component, locate the Materials section.
There you will see the base material that was applied to the terrain, as well as the Terrain Layers section, where the additional material layers will be added.
These layers define which materials can be painted over the terrain surface.
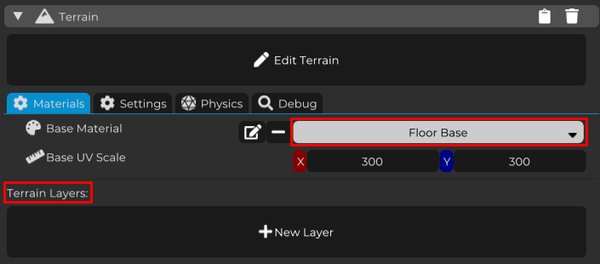
By clicking New Layer, a new layer will be created.
Inside this layer, you can assign one of the materials created previously.
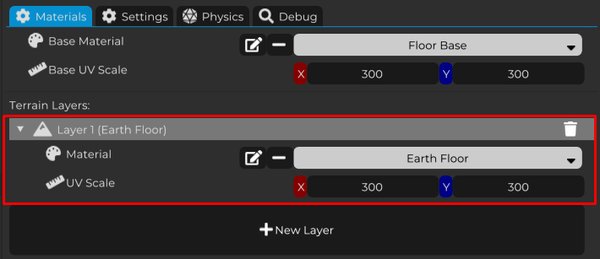
Create one layer for each material that will be used on the terrain and assign the corresponding material to each layer.
The order of the layers directly affects how textures overlap during painting. Because of that, keep them organized according to the priority of each material.
Layers with higher numbers have priority over the previous ones, meaning their textures will be applied above the others.
In this example, the texture from Layer 5 overlaps all the other layers.
If necessary, you can change the order of the layers at any time using the arrows located on the right side of the list.
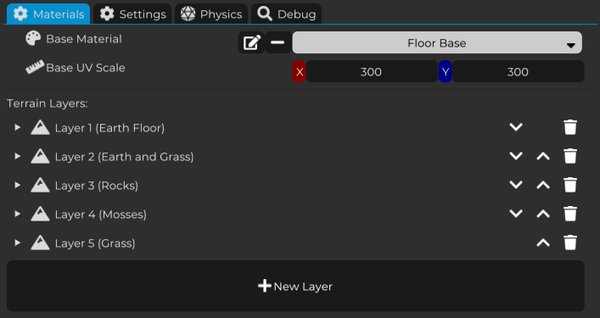
At the end of this step, you will have the base material applied to the terrain and all Terrain Layers configured with their respective materials.
Everything will be organized in the correct order and ready for terrain painting in the next lesson.