Cave: Terrain System Introduction
Sculpting the Terrain
Lesson 3 of 6 • 10 XP
Keep your place in this quest
Log in or sign up for free to subscribe, follow lesson progress, and access more learning content.
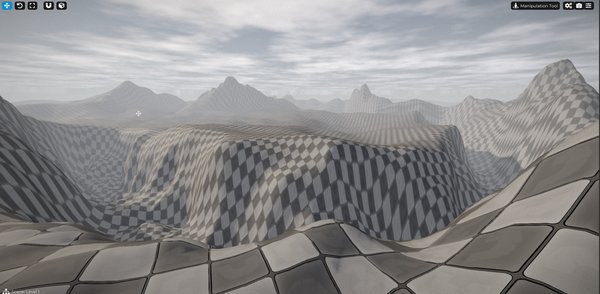
In this lesson, you will learn how to use the different terrain brushes available in Cave Engine to sculpt your terrain and create elevations, depressions, roads, paths, and more natural shapes for your environment.
The goal here is not only to understand what each brush does, but also to start combining them in practice. A good terrain is usually created in multiple passes: first you define the large shapes, then you refine the surface, smooth rough areas, add natural variation, and finally adjust specific areas such as roads or paths.
1. Sculpting
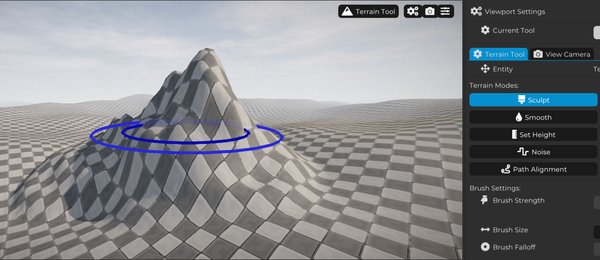
With the Sculpt brush selected, position the cursor over an area of the terrain and hold the left mouse button.
As the brush is applied, the terrain surface will be raised, allowing you to create relief shapes such as hills, mountains, slopes, and other natural formations.
This is usually the first brush you will use when shaping a terrain, because it gives you direct control over the main form of the environment.
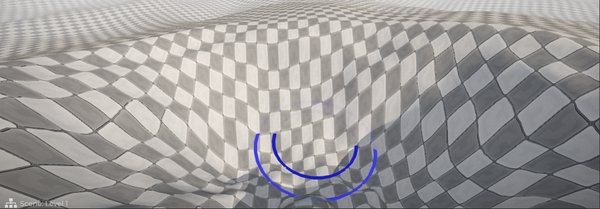
If you want to reduce the height of the terrain, hold Ctrl while using the left mouse button.
This makes the brush lower the surface instead of raising it, allowing you to create valleys, depressions, craters, lowered roads, rivers, and other variations.
By combining both raising and lowering, you can model the terrain according to the needs of your scene.
In the brush settings, you can adjust the Brush Strength value.
This controls the intensity of the tool. The higher this value is, the stronger the influence of the brush will be over the terrain. Lower values create softer and more precise changes, which are useful when you want more control.
For large terrain changes, you can use a higher strength. For small adjustments and finishing touches, it is usually better to use a lower value.

The Brush Size defines the size of the area affected by the brush.
When you increase this value, a larger region of the terrain will be modified. When you reduce it, the changes will be applied to a smaller and more specific area.
Use larger brush sizes to block out the main terrain shapes, and smaller brush sizes for details and localized adjustments.

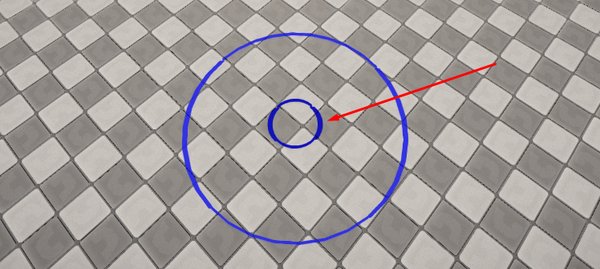
The Brush Falloff controls how the brush influence transitions from the center to the edges.
By adjusting this parameter, you define the size of the central area where the effect is stronger, represented by the inner circle of the brush marker. From that region, the influence gradually decreases until it reaches the outer edge of the brush.
This allows you to create either softer transitions or sharper terrain changes.
A higher falloff can help create smoother and more natural surfaces, while a lower falloff can be useful when you want stronger and more defined shapes.

Use the Smooth brush to soften areas of the terrain that have very strong marks or abrupt transitions.
This brush helps create more natural transitions and gives the terrain a more polished and uniform finish.
It is especially useful after using Sculpt with higher strength values, because the surface may become too rough or sharp.
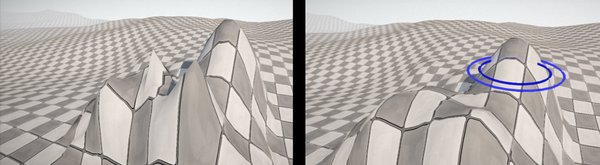
With the Set Height brush, which defines a fixed height for the terrain, you can create leveled areas such as plateaus, cliffs, lowered paths, arenas, or any structure that requires a constant elevation.
This brush is useful when you want a specific region to stay at the same height instead of being shaped freely.
For example, you can use it to prepare a flat area for a building, a road, a base, or a platform.
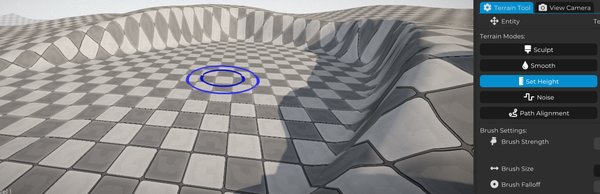
The Noise brush applies random height variations to the terrain.
It is ideal for creating relief with more organic and irregular shapes. This tool is excellent for generating mountains, hills, and other natural formations with different sizes and proportions, helping avoid repetitive patterns on the terrain surface.
You can also use Noise with lower strength values to add subtle variation to areas that look too flat or artificial.
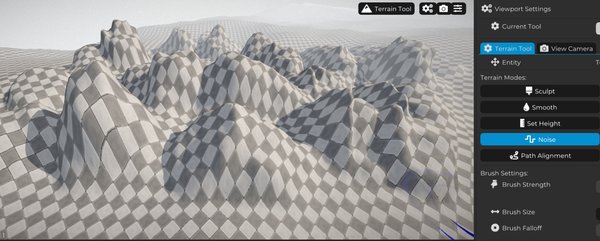
Then use Erosion to simulate natural terrain erosion.
This brush adds worn areas, grooves, and small irregularities to the relief, making the environment look more natural and interesting.
Erosion is a good finishing tool after the main sculpting pass. Once the large terrain shapes are already defined, it helps break the artificial look and gives the surface a more believable result.
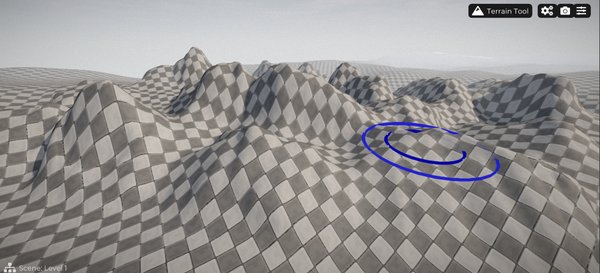
If your project needs roads or trails, Path Alignment is an excellent option to make the process easier.
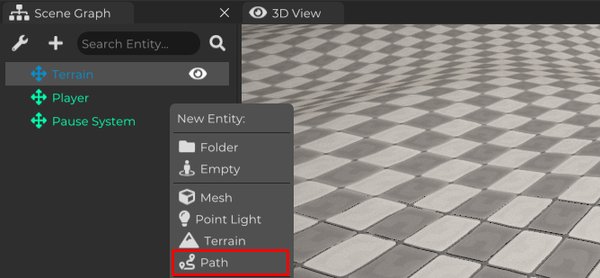
The first step is to add a Path Entity to the Scene Graph.
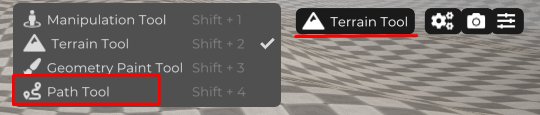
Then change the mode from the Terrain Tool to the Path Tool.
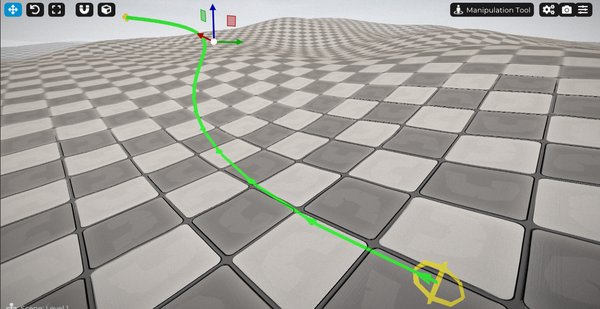
With the Path Tool active, you can select and move the control points of the Path, defining the route of the road.
These points allow you to create smoother or sharper curves, giving you control over the shape of the path before applying it to the terrain.
This is useful because you can first design the road layout visually and only then align the terrain to it.
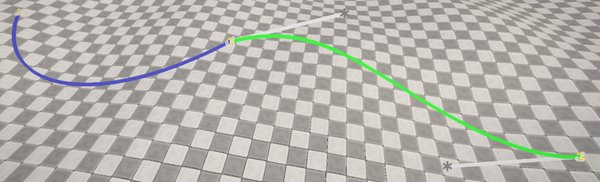
You can also create multiple Paths.
By positioning their endpoint control points close to each other, they will connect, allowing you to create longer roads with more complex routes and varied curves.
This makes it possible to build larger road networks while keeping the path structure easier to manage.
It is also worth remembering that Cave Engine allows you to create folders in the Scene Graph to organize the elements of your scene.
A good practice is to create a dedicated folder for Paths, keeping all paths used in the project grouped together. This makes them easier to find, edit, and manage later.
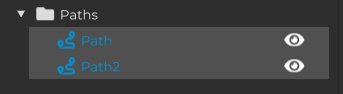
After configuring the Path, select the terrain again and change the tool back to Terrain Tool.
Then choose the Path Alignment mode.
After doing that, a new section will be displayed where you need to enter the name of the Path created previously.
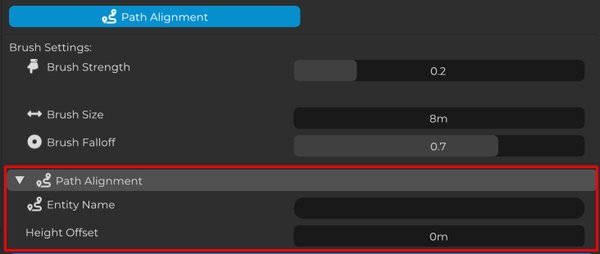
After entering the Path name correctly, the Auto Align to Path button will become available.

When you press it, Cave Engine will automatically adjust the terrain along the defined path, creating a proper base for roads and trails.
This does not mean the road is completely finished, but it gives you a very useful starting point. After the alignment, you can continue using Smooth, Sculpt, Flatten, or other brushes to refine the result.
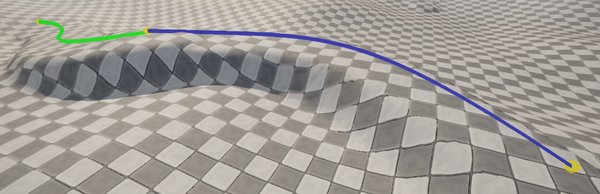
Each tool has a specific purpose, from creating and smoothing terrain relief to generating organic shapes and automatically aligning roads.
Now is the time to experiment.
Try different values for Brush Strength, Brush Size, and Brush Falloff. Combine the brushes with each other and observe how small changes can produce completely different results.
Do not be afraid to explore each tool and discover which combinations work best for the style of environment you want to create.
Terrain creation is a practical process. The more you test, the faster you will understand how each brush behaves and how to use them together to create more interesting landscapes.