Cave: Terrain System Introduction
Painting Geometry on the Terrain
Lesson 6 of 6 • 10 XP
Keep your place in this quest
Log in or sign up for free to subscribe, follow lesson progress, and access more learning content.
In this lesson, you will learn how to use Geometry Paint to distribute assets over the terrain.
This tool allows you to quickly add vegetation, rocks, props, and other environment elements to your scene, using randomized distribution to make the terrain look more natural and detailed.
Instead of manually placing every tree, bush, rock, or grass patch one by one, you can use the Geometry Paint Tool to paint multiple objects directly over the terrain surface.
1. Geometry Paint Tool
To start painting geometry on the terrain, change the current tool mode to Geometry Paint Tool.
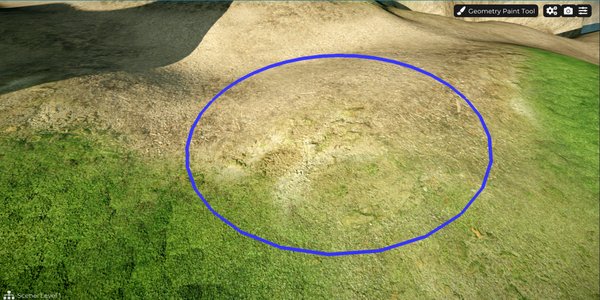
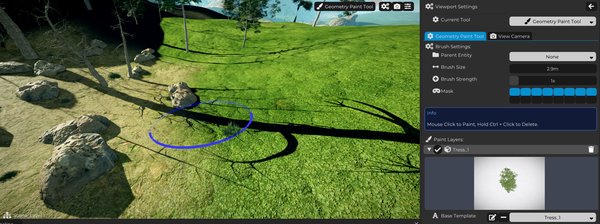
When you do this, a blue circular marker will appear in the 3D View, similar to the one used by the Layer Paint tool.
This marker represents the area where the geometry assets will be distributed over the terrain.
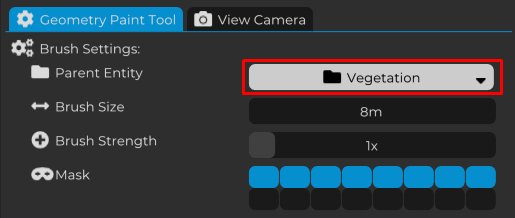
To keep the project organized, create a folder in the Scene Graph dedicated to the assets that will be distributed by the Geometry Paint Tool.
Then select this folder in the Parent Entity field.
This way, all geometry objects created during painting will automatically be added inside this folder, making it much easier to organize, find, and manage them later in the scene.
This is especially important because geometry painting can quickly create many objects. Without a parent folder, your Scene Graph can become difficult to navigate.
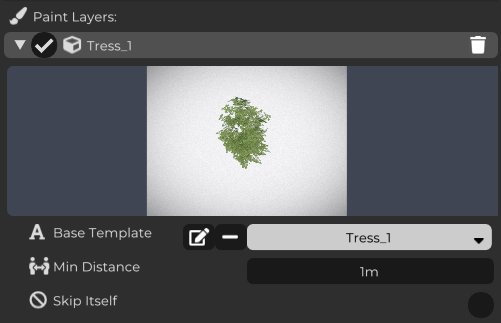
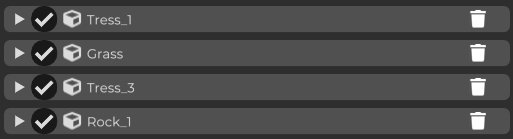
Now create a new Layer and select the Template of the asset you want to distribute over the terrain.
In this example, we are using a tree asset, but you can choose any other type of element, such as bushes, rocks, flowers, grass, mushrooms, debris, or any environment prop that makes sense for your scene.
Each Geometry Layer is responsible for distributing one type of asset. This allows you to combine different elements and create a richer, more natural environment.
Repeat this process to create as many layers as needed, adding different types of assets to the terrain.
You can combine trees, bushes, rocks, flowers, tall grass, and other elements to create more varied vegetation and a scene with much more visual detail.
A good approach is to separate each asset type into its own layer. This gives you more control when painting, removing, enabling, or disabling specific groups of objects.
2. Paint Layer Settings
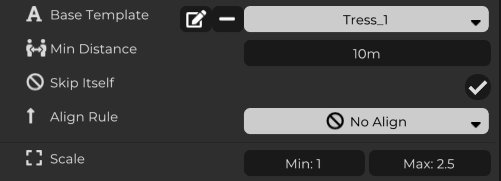
Before you start painting, you can configure each layer individually to control how the assets will be distributed over the terrain.
The Min Distance parameter defines the minimum distance between objects, preventing them from being placed too close to each other.
The Skip Itself option prevents a new asset from being painted on top of another asset of the same type.
You can also configure Scale Min and Scale Max, defining the minimum and maximum scale for each object.
This is very useful because it makes each instance appear with a slightly different size, creating more visual variation and making the scene feel more organic.
For example, if all trees have the exact same size, the environment can look artificial. By using random scale variation, the result becomes much more natural.
3. Configuring the Masks
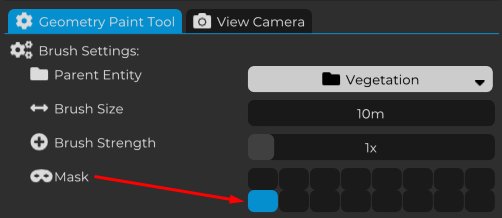
To make sure the geometry is painted only over the terrain, use the Mask settings of the Geometry Paint Tool.
Disable all masks and leave only Mask 8 enabled.
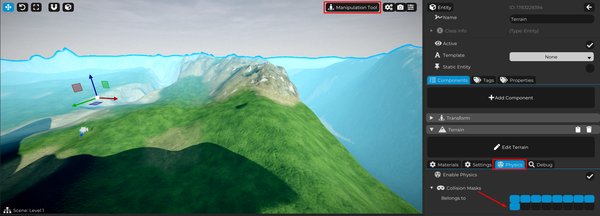
Now return to the Manipulation Tool and select the terrain.
Then, in the Physics settings, enable Collision Mask 8.
With this configuration, the Geometry Paint Tool will recognize the terrain as a valid surface for geometry painting.
From now on, whenever you want to paint assets over any other surface in the scene, you only need to enable Collision Mask 8 on that Entity as well.
This gives you precise control over where geometry can be distributed.
For example, you may want to allow painting on the terrain, but not on the player, buildings, props, or other objects. The mask system allows you to define exactly which surfaces are valid.
4. Painting Geometry on the Terrain
Position the circular marker over the area of the terrain where you want to distribute geometry.
Then hold the left mouse button to start painting.
All assets configured in the active Paint Layers will be automatically distributed inside the selected area, respecting the settings defined for each layer, such as minimum distance, scale variation, and other parameters.
This allows you to fill the environment quickly, naturally, and with good visual variety.
If you want to remove geometry from a specific area, hold Ctrl while holding the left mouse button over the desired region.
All assets inside that area will be removed, allowing you to adjust the distribution and repaint whenever necessary.
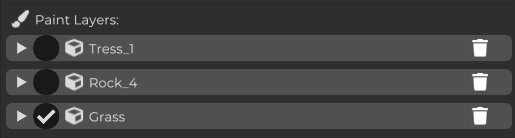
You can also enable or disable Paint Layers individually.
Only the layers marked as active will be considered during painting.
This gives you much more control over asset distribution.
For example, you can disable the tree and rock layers, keeping only the grass layer active to paint only that type of vegetation. Then, you can enable the other layers again to continue enriching the scene with more elements.
This workflow makes it easier to build the environment in passes: first grass, then rocks, then trees, then smaller details.
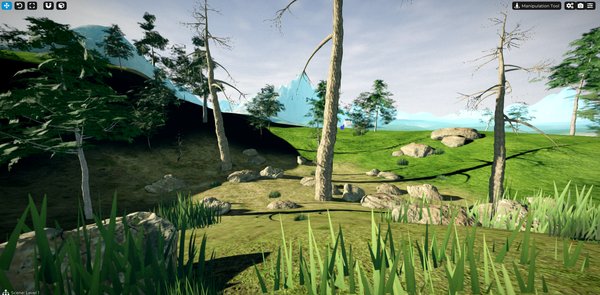
At the end of this Quest, you will have a much richer and more detailed terrain, combining different surface textures with a natural distribution of assets using Cave Engine’s terrain system.
With the sculpting tools, texture painting, and geometry painting, you can create environments much faster, in a more organized way, and with a much better visual result.
Now it is time to put everything into practice.
Experiment with different combinations of materials, vegetation, props, and terrain shapes. Explore the available tools, adjust the layer settings, test different distributions, and use your creativity to build unique and more immersive environments.